Trying Out Airflow
→ 日本語版を読むKey Points of Airflow
In Airflow, workflows are called DAGs. A DAG consists of multiple Tasks.
Tasks execute various processes, and the DAG defines the execution order of each Task.
Tasks come in types such as Operators and Sensors.
So the relationship looks like this:
- DAG
- Tasks (Operators and Sensors)
Operator includes things like BashOperator for handling bash commands and PythonOperator for calling Python functions.
Hook is a component of Operators that makes it easy to use external platform APIs. For example, even without knowing the detailed API specifications of BigQuery, you can use the Bigquery Hook provided for BigQuery and use the available functions to easily write operations like table creation (described later).
Sensors wait until they detect that an event has occurred. For example, you can start processing when a file is created.
Defining DAGs and Tasks
In the following example (bq.py), an empty table is created in BigQuery. The DAG is declared with with DAG(...) as dag:, and a Task called create_bq_table is placed inside the with block.
The create_bq_table Task calls the create_bq_table() function, which creates a BQ table. The create_bq_table() function uses a Hook called BigQueryHook() and creates an empty table with the create_empty_table() method. BigQueryHook() has various methods.
Since BigQueryHook() operates on BigQuery on GCP, GCP credentials must be passed. In Airflow, credential definitions for external platforms are called Connections. In bq.py, the credentials used by BigQueryHook() are specified with gcp_conn_id='google_cloud_default'. Connections can be defined using the Airflow Web UI (reference)
'''
Create an empty table in BigQuery.
'''
from datetime import datetime

from airflow.models import DAG
from airflow.operators.python import PythonOperator
from airflow.providers.google.cloud.hooks.bigquery import BigQueryHook

def create_bq_table():
    bigqueryhook: BigQueryHook = BigQueryHook(gcp_conn_id='google_cloud_default')

    project_id      = "dev-gcplab-01"
    dataset_id      = "devbqds01"
    table_id        = "emp_salary"
    schema_fields   = [
        {"name": "emp_name", "type": "STRING", "mode": "REQUIRED"},
        {"name": "salary", "type": "INTEGER", "mode": "NULLABLE"},
    ]

    bigqueryhook.create_empty_table(
        project_id      = project_id,
        dataset_id      = dataset_id,
        table_id        = table_id,
        schema_fields   = schema_fields,
    )

with DAG(
    'bq01',
    start_date=datetime(2023, 10, 8),
    schedule='@daily', # Other interval presets: https://airflow.apache.org/docs/apache-airflow/1.10.1/scheduler.html#dag-runs
    catchup=False # Do not retry.
) as dag:
    create_bq_table = PythonOperator(
        task_id = "create_table",
        python_callable = create_bq_table,
    )
Defining a DAG
https://airflow.apache.org/docs/apache-airflow/stable/core-concepts/dags.html#declaring-a-dag
There are three ways to define a DAG:
- Using a context manager
- Using a constructor
- Using a decorator
Using a context manager
from airflow import DAG

with DAG(
    dag_id="my_dag_name",
    start_date=datetime.datetime(2021, 1, 1),
    schedule="@daily",
):
    EmptyOperator(task_id="task")
Using a constructor
from airflow import DAG

my_dag = DAG(
    dag_id="my_dag_name",
    start_date=datetime.datetime(2021, 1, 1),
    schedule="@daily",
)
EmptyOperator(task_id="task", dag=my_dag)
Using a decorator
from airflow.decorators import dag

@dag(start_date=datetime.datetime(2021, 1, 1), schedule="@daily")
def generate_dag():
    EmptyOperator(task_id="task")

generate_dag()
Trying Airflow Locally
To try Airflow locally, using the Composer Local Development CLI tool is the easiest approach.
GCP provides an Airflow execution environment service called Cloud Composer, and GCP has prepared a tool that lets you use Composer locally (very helpful). What the tool does is create and start an Airflow environment as a Docker container.
Of course you can also set up an Airflow environment using Docker containers directly, but since that is cumbersome, I think it's better to use this tool.
To use the tool, install Python version 3.7 to 3.10, pip, and Google Cloud CLI beforehand.
The tool is installed by cloning from git and installing with pip.
$ gcloud auth application-default login
$ gcloud auth login
$ git clone https://github.com/GoogleCloudPlatform/composer-local-dev.git
$ cd composer-local-dev
$ pip install .
$ composer-dev list-available-versions --include-past-releases --limit 10
$ composer-dev create --from-image-version composer-2.4.4-airflow-2.5.3 local_composer_env # Make sure Docker is running beforehand!
$ composer-dev start local_composer_env # composer-dev restart local_composer_env
When you start the Airflow environment with composer-dev start local_composer_env, the following message is displayed.
Started local_composer_env environment.

1. You can put your DAGs in C:\Users\xxxxx\Documents\Airflow\composer-local-dev\composer\local_composer_env\dags
2. Access Airflow at http://localhost:8080
The Airflow web server is also started, so you can access the Airflow Web UI by opening a browser and going to http://localhost:8080.
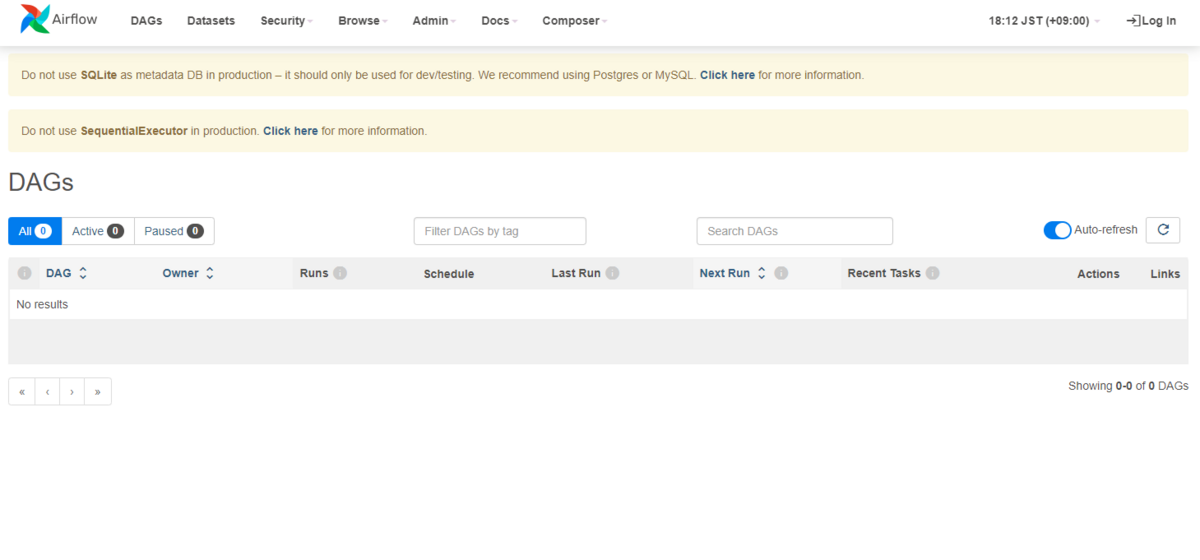
If you save the .py file you created in C:\Users\xxxxx\Documents\Airflow\composer-local-dev\composer\local_composer_env\dags, the Airflow Web UI will periodically load it.
Connection
Since I want to run the bq.py created earlier in Airflow, first I'll store bq.py in the directory that Airflow reads.
Furthermore, since service account credentials are needed to perform operations on GCP, I'll configure the Connection.
Create a service account on GCP and create a service account key. Assign the Composer Worker role and the BigQuery User role to the service account.
Copy the created service account key into the Airflow container using the docker cp command. To verify the file has been placed by entering the container, use docker exec -it composer-local-dev-local_composer_env /bin/bash.
> docker cp [local service account key file] composer-local-dev-local_composer_env:/home/airflow/sa_key.json
Now that everything is ready, set the service account key in the Connection.
In the Airflow Web UI, select Admin -> Connections. Edit the Connection named google_cloud_default and specify the path of the service account key in Keyfile Path.
Confirm the connection works with the Test button, then click Save.
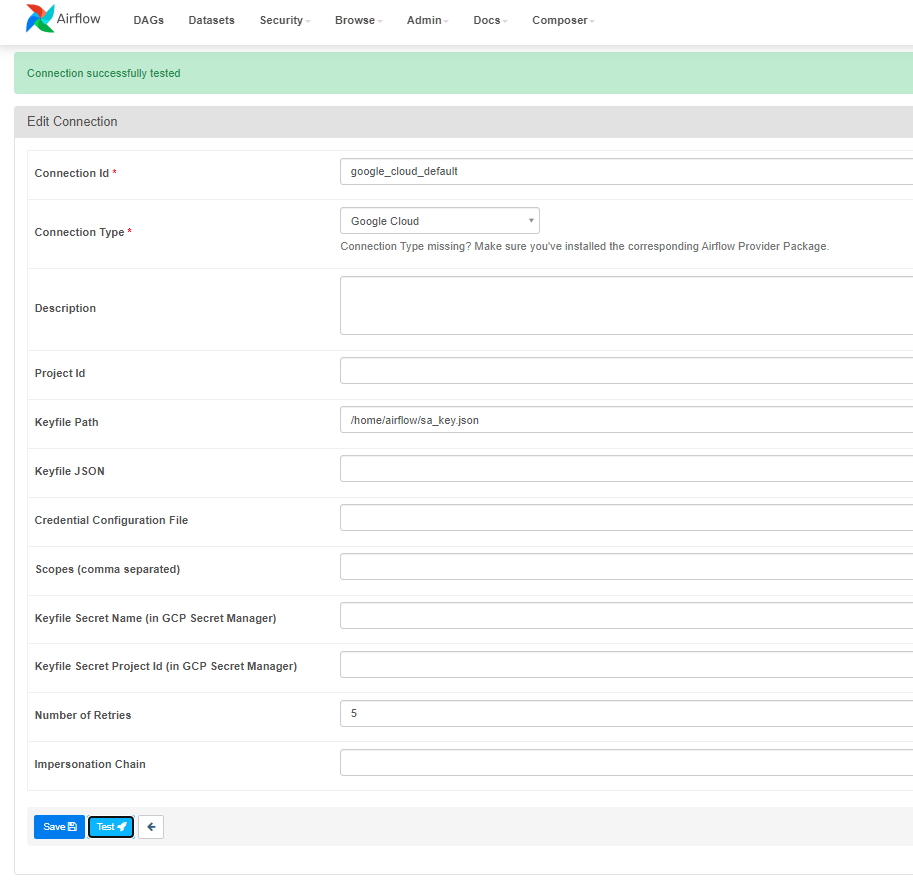
This completes the Connection configuration. In a production environment, Connection information should be managed in GCP's Secret Manager, but since this is a local test, the above method was used.
Manual DAG Execution
Now that the DAG is ready to run, let's execute it. However, make sure to create the dataset dev-gcplab-01.devbqds01 in BigQuery beforehand.
In the Airflow Web UI, click the play button for bq01 in the DAGs view, then click Trigger DAG to run the DAG.
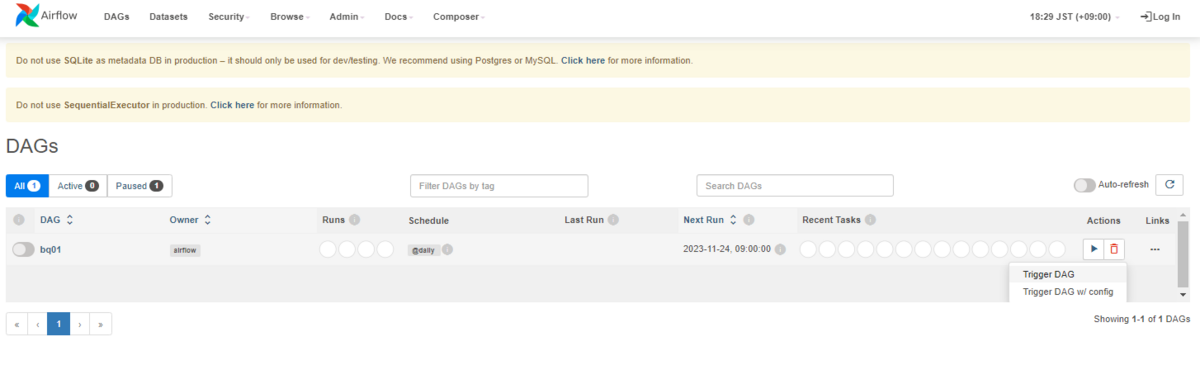
After a while, the DAG status will become success. If it fails, it will show error.
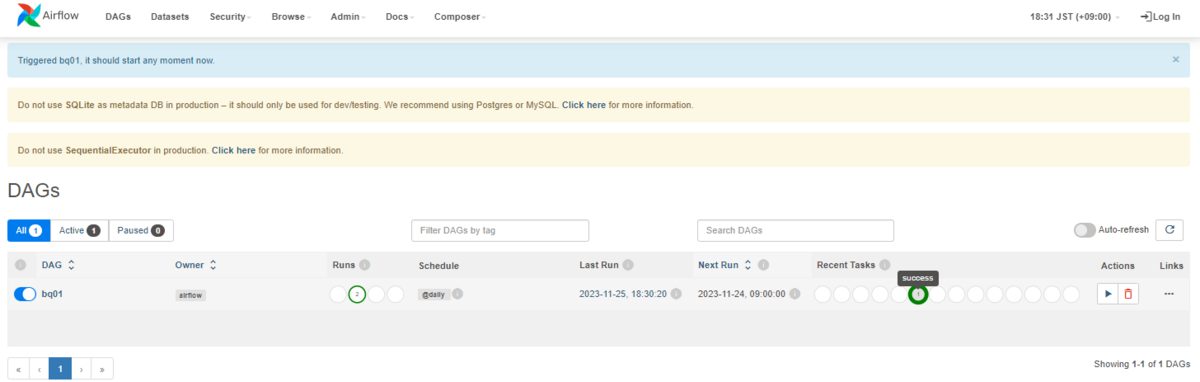
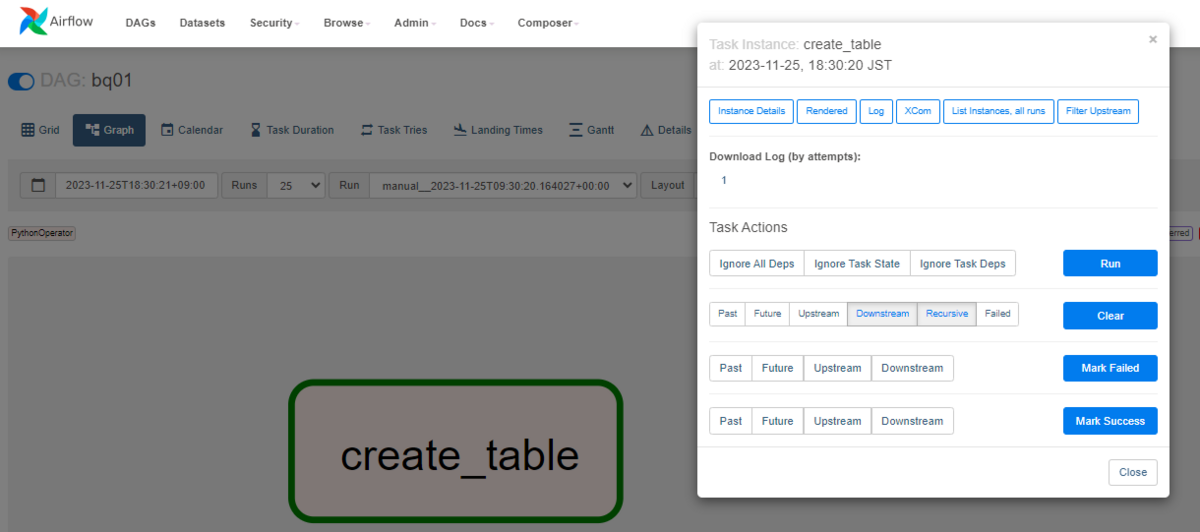
If it shows error, navigate to the Graph view of bq01, display the Log of the failed task, and check the cause of the error.
That's all for now.
Next time I'd like to summarize task execution order and Airflow architecture.