Connecting to the Internet via WiFi AP with a Cisco 841M Router
→ 日本語版を読むOverview
Notes on the initial setup of the Cisco 841M router and the settings required for internet connection.
What Was Purchased This Time
I wanted to try configuring site-to-site VPN, so I purchased the Cisco router 841M. The only included accessory is the power cable, so a LAN cable and other items are needed separately.
I already had a LAN cable, but since my PC didn't have a LAN port, I purchased a USB-to-LAN adapter.
You can connect to the router via Telnet by connecting to the LAN port, but I also wanted to try console connection, so I purchased a cable that allows console connection from a USB port.
About the Cisco C841M Router
The Cisco C841M-4X-JSEC/K9 measures 4.4 x 34.3 x 17.5 cm, so it's quite small. And at 1.7 kg, it's lightweight. So it doesn't take up much space sitting on a work desk.
It has 4 LAN ports and 2 WAN ports.
GigabitEthernet 0/0, 0/1, 0/2, 0/3 are the LAN ports, and GigabitEthernet 0/4, 0/5 are the WAN ports.
The LAN ports are Layer 2, so you configure VLANs etc. and connect your PC.
For the WAN port, when connecting at home, you would connect to an ONU, modem, or WiFi AP. As mentioned later, in this case I connected to a WiFi AP with router functionality.
Supports IPsec VPN.
For other specifications, refer to:
Password and Other Initial Settings
First, perform initial settings such as password configuration.
Connect the PC to the router's LAN port. In this case, I connected to GigabitEthernet 0/0.
Plug the power cable into the router. After waiting for it to boot, connect to GE 0/0 and connect via Telnet to 10.10.10.1. I used Teraterm for the Telnet connection.
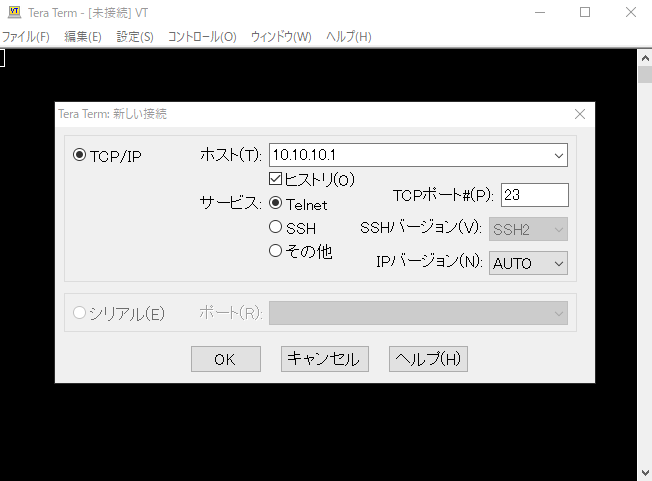 Telnet connection to 10.10.10.1 using Teraterm
Once connected, first enter username and password. The initial username is cisco and the initial password is also cisco.
Enter enable to switch to privileged mode, then configure terminal to enter config mode.
In config mode, set the username and password.
Enter end to exit config mode and return to privileged mode.
> enable
# configure terminal
(config)# username xxxxx password xxxxx
(config)# end
# copy running-config startup-config
Use the copy running-config startup-config command to save the settings to startup-config so they don't disappear when the router is powered off.
[IMPORTANT!]
If you don't set a username and password on the first connection, the next time it boots there will be no password set and you won't be able to access it.
In that case, you need to either connect via console and reload, or long-press the reset button on the back of the unit to reset it.
For password recovery via console connection, refer to here. Console connection requires the console cable mentioned earlier.
Next, set the privileged password with enable password.
# configure terminal
(config)# enable password xxxx
With console connection, you can switch to privileged mode with just the enable command without a password, but with LAN port connection, you cannot switch to privileged mode if a privileged password is not set. So it needs to be configured during initial access.
This completes the initial setup.
Checking Default VLAN Settings
I connected my PC directly to the router via Telnet, but I didn't fully understand why it connected, so I checked the default VLAN settings.
Using the show vlan-switch command, you can confirm that by default all LAN ports (GE 0/0 ~ 0/3) belong to Vlan1.
C841M#show vlan-switch

VLAN Name                             Status    Ports
---- -------------------------------- --------- -----------------------